
For guinea pig parents who want to give their guinea pigs a taste of nature but don’t necessarily have a lot of nature around them, we have a great DIY solution! This is great for those of you piggy parents that live in urban areas and don’t have your own gardens for your piggies to run around safely in.
Recently, GuineaDad has been building and putting together a grass platform, or a “lawn,” as we affectionately call it. As with any kind of project, this takes time and patience and as long as you put in both of these things, you’ll have a great grassy lawn area for your guinea pigs to frolic around safely!
GuineaDad lives in an apartment that happens to have a nicely-sized balcony, and that’s where he has placed the lawn. While the balcony doesn’t get a whole lot of direct sunlight, the grass has still been able to grow very well! So if you’re planning on doing this, but are worried about getting decent sunlight for grass growth, don’t be discouraged.
We also have a few vlogs on YouTube that detail the process of this build, which you can watch over on our YouTube channel.
Why do guinea pigs need a lawn?
Even though guinea pigs are able to get a good amount of exercise in their cage as long as it is large enough and if they’re given floor time inside your home, it can get pretty boring seeing the same places and things day in and day out.
By creating an area outside that your guinea pigs can use safely, they’re able to get some exercise in the fresh air, and they’ll get a little vitamin D from some sunlight! You’re also able to control most, if not all elements of your guinea pig’s exposure to the outside world by doing this as well.
You may be wondering, is grass good for guinea pigs, or is it okay for guinea pigs to eat grass? As long as you choose a safe grass type for your guinea pigs, they should be able to eat it safely as well.

Materials you’ll need
Wood for the floor and walls
When it comes to the wood for the floor of the grass platform, make sure you get some that you will be able to easily cut and hammer into, because you might need to make adjustments for the size of your balcony and the size of the lawn that you’re trying to build. For the bottom and floor of the lawn, we utilized plywood sheets.
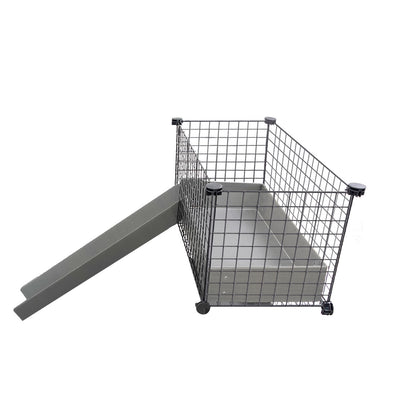
For the wood that makes up the walls, make sure that the planks’ width is wide enough that your guinea pigs won’t be able to hop and popcorn over! This, of course, is for their safety!
You’ll also need some pieces of wood that you’ll use to secure the plywood together and support them. (GuineaDad sacrificed the walls of the Queen’s Castle for this purpose, but similar-shaped square pieces will work well for this too!)
Overall, when it comes to the type of wood that you choose to use, make sure that you’re not using any softer woods like cedar or pine. If you’ve read our blog post on the best bedding for guinea pigs, then you’ll know that cedar and pine woods give off a scent that is toxic to guinea pigs and can destroy the linings of their respiratory tract and make them sick. Always use solid hardwoods.
Power drill and screws
This will make it a lot easier for you to assemble your lawn platform. It’ll also save you some time, since you won’t be manually screwing each piece of wood together.
Pea pebbles
The purpose of pea pebbles is for even and consistent drainage of water, while helping with constant hydration of the roots without any rotting. It’s important that the grass gets enough water, but isn’t overwatered. It’s an important balance!
Weed control film
This one is exactly what it sounds like! It helps with preventing the growth of weeds, which can ruin your grass.
All purpose garden soil
This one is pretty self explanatory, but grass needs soil to grow! Gardening soil is great for all purposes because it’s easy to improve its overall condition if it were to dry out or run out of nutrients.
Watering can
This will be used not only to water your grass, but it will help you with cleaning your balcony and making sure that it’s clean.
Ryegrass Seeds
The kind we got is technically supposed to be used as a spot treatment, but it worked well for the purpose of growing a small lawn! Ours had mulch, plus the seeds and fertilizer all in one. The packaging also says that it can grow in sun and shade, so this works well for us!
Ryegrass is a type of grass that is often utilized for grazing and hay for many animals because of its high nutritional value, and is also good for your guinea pigs.
How to build the lawn
Step 1: Clean your balcony

It’s important that the whole area is clean, not just the part where you’re planning on placing the lawn! This is for your guinea pigs’ health and safety, and it benefits you as well. Here’s the motivation to do some cleaning—it’s for your piggies!
GuineaDad spent time sweeping away all the dirt, dust, and any other kinds of debris away, and sprayed it down with water using a watering can! His balcony has a drain, so he swept the dirty water into it!
Step 2: Lay down the wood for the floor and walls.

This is so you can get a visual idea of how it’s going to look before you actually start putting it together. You’ll also be able to rearrange anything that you need to, without going in blind or unprepared! You will also need to utilize your smaller pieces of wood and place them down at the seams of the plywood to map out where they need to be connected.
In our case, we used six sheets of plywood, and placed the connecting pieces at the four corners where they meet. To be clear, these wooden support pieces are going to be underneath the lawn! So they’ll be in contact with the floor of your balcony, not the grass and soil.

Step 3: Secure and attach the walls.
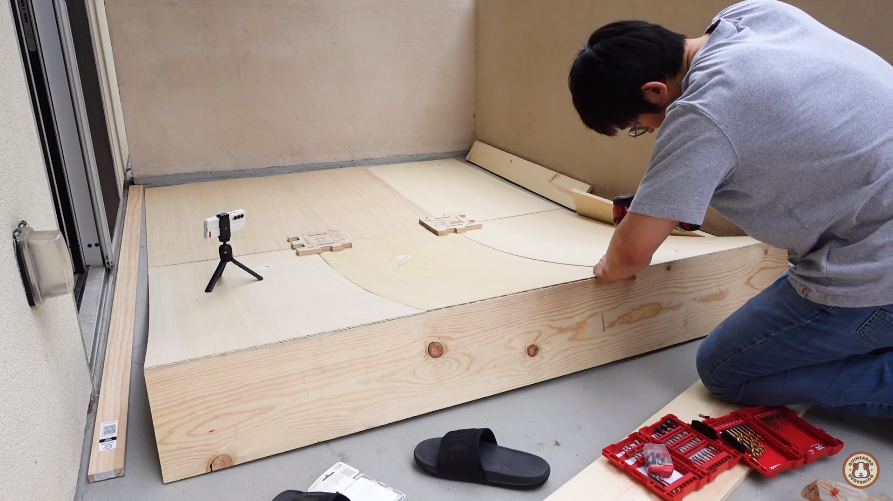

For the front and back walls, it will be easier for you to attach them while the floor is flipped over with the support pieces still on top. This is because the attachment will be done with the bottom of the wall first. Once you attach those, you can flip the whole thing over and start attaching the side walls.
GuineaDad did all of this alone, but it can be an easier (and faster) project if you have someone to help you!
Step 4: Lay down the weed control film.

Once the frame and platform have been created, you’re ready to start the gardening portion of this DIY project! The weed film comes in a roll, so you’ll need to lay it down and trim it to fit. Make sure that all the nooks and crannies are covered, and that there is a little bit to cover up to 2 or 3 inches of the walls as well.
Step 5: Cover the bottom with the pea pebbles.

The purpose of these are to prevent weed growth and to prevent the roots from rotting, while also retaining moisture so your grassroots will be hydrated. If the roots rot, then your grass will die, and you will have done all that work for nothing! You’d have to start over.
The pea pebbles will also improve the drainage whenever you water the grass. You’re going to need more than you think! The pea pebble layer should be around 2 inches thick. We bought eight bags of this, and we used all of it.
Step 6: Pour in the garden soil.

Make sure every inch of the pea pebbles are covered in the soil as evenly as possible! This is so the grass can grow evenly as well. GuineaDad used his hands and the soles of his sandals to spread out the soil, but you can definitely use a garden shovel or small rake to keep your hands a bit cleaner.
Step 7: Sprinkle the ryegrass seeds onto the soil.

As we mentioned before, what we used was supposed to be for spot treatment, but because we’re just making a small lawn for guinea pigs, it works well for that purpose. We used three large containers of this!
Make sure you’re spreading this evenly over the soil to ensure even grass growth! You’ll know you’ve spread enough of the mulch/seeds/fertilizer mixture when you can just barely see the soil through it. This will make sure the grass grows thick and lush! We want there to be lots for the guinea pigs to munch on.
Step 8: Water!

We used a watering can since we don’t have a hose like a normal house would! GuineaDad Water your lawn until it’s sufficiently damp, and try to do this as evenly as possible.
Step 9: Let your grass grow!
This is where more of your time and patience will be needed! Make sure you’re watering your lawn every day, but make sure that you’re not also over-watering. As we mentioned previously, GuineaDad’s full balcony doesn’t get full exposure to sunlight, but it has still been able to grow pretty well, considering!
That means that the “sun and shade” purpose of the ryegrass works very well, and we recommend getting this kind if it’s also available to you. If your balcony gets good sunlight, this will still work well for you too.

(These are our progress shots from one week of growth.)

(And then two weeks of growth!)

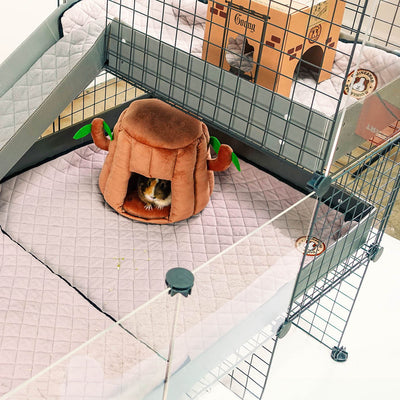
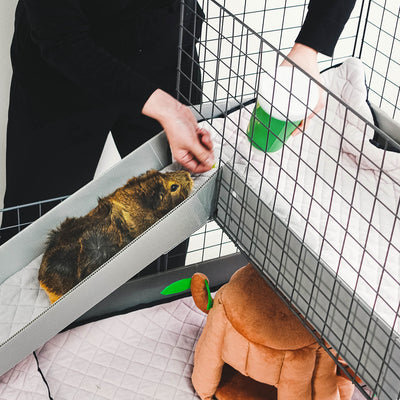
Piggy grass time!
Once your grass grows in enough, your guinea pigs will be able to play around in it as much as they want! Giving them this kind of (manmade) nature is great for them, because it will give them some brand new stimulation that will also encourage them to be active and play around with their piggy companions.
You can set up a little vegetable picnic for your piggies, and bring out some toys!
If your guinea pigs are a little unsure of what to do at first, you can bring out a tunnel and a hidey to bring some familiarity to the new area for them. Make sure your grass isn’t too wet before you bring out any toys made of fabric!
By giving your guinea pig this kind of stimulation and enrichment, you’re able to help your guinea pigs become happier and healthier, which in turn will help extend their lifespans!
If you're interested in watching the process in a video, check out our vlogs!


4 comments
Also, what kind of plant seeds are safe for Guinea pigs,and how much space is recommended for a Guinea pig meadow(cage size)?Do you think there are some plant that produce fruits and veggies that we(Guinea pig owners)can put in there so Guinea pigs can eat them when they are out,and so we can pick some for them?
It’s a really nice idea I will probably do something similar,I have a yard it’s just super big so it would be easy for my Guinea pigs to be lost,and it’s not secure.Bunnies come in and out no doubt the Guinea pigs would be able to get out,plus it’s good to be able to see them and wach them in case something happens because I have a garden with ants,bees,and wasps probably other bugs 🐜 🐛 🐞.Your idea will come in handy for my Guinea pigs ,plus my dad has tons of wood in the garage I’ve been waiting to use on a project.
Great idea, but where did you buy your seeds? We have two guinea pigs and want to grow some guinea pig-friendly grass for them. Thank you, Shane
Amazing idea ,